Amigo Studios
DAC Podcast Trailer - Interactive Diagram
{{ popup.title }}
{{ popup.sub }}
{{ ln.t }}
{{ tip.text }}
Cable layers
Video village gear
1 MacBook Pro · 2 Rodecaster Pro II
3 Multicam monitor · 4 ATEM Extreme ISO
5 Program monitor · 6 Headphone splitter
Tap any device on the map for its detail card (shown top-left). Tap empty space to clear.
Connectivity
Starlink setup
Get the trailer online, then aim the dish for a clean signal.
1
Download the Starlink app
Tap to open starlink.com/app ↗
2
Log in to the app
User
Asst@rockykanaka.com
Pass
FlipFarms2025!
3
Connect to Wi-Fi
Network
FlipFarms
Password
FlipFarms1
i
Troubleshoot
Use the alignment & obstruction tab in the app to properly position the Starlink.
On the day
Shoot checklist
{{ checkSummary }}
{{ sec.t }}
On-site power
Predator 7000
Wheel it out, cable it up, and start the trailer's power.
1
Wheel the generator from storage to the far end of the trailer.
2
Plug the red and black power cables from the generator into the inlet on the front-right corner of the trailer.
3
Check the gas-level gauge on top of the generator — refill if necessary.
4
Press the round engine start button, then flip the red power switch to Run.
5
Plug the video village extension power into the outlets on the left.
i
Control panel
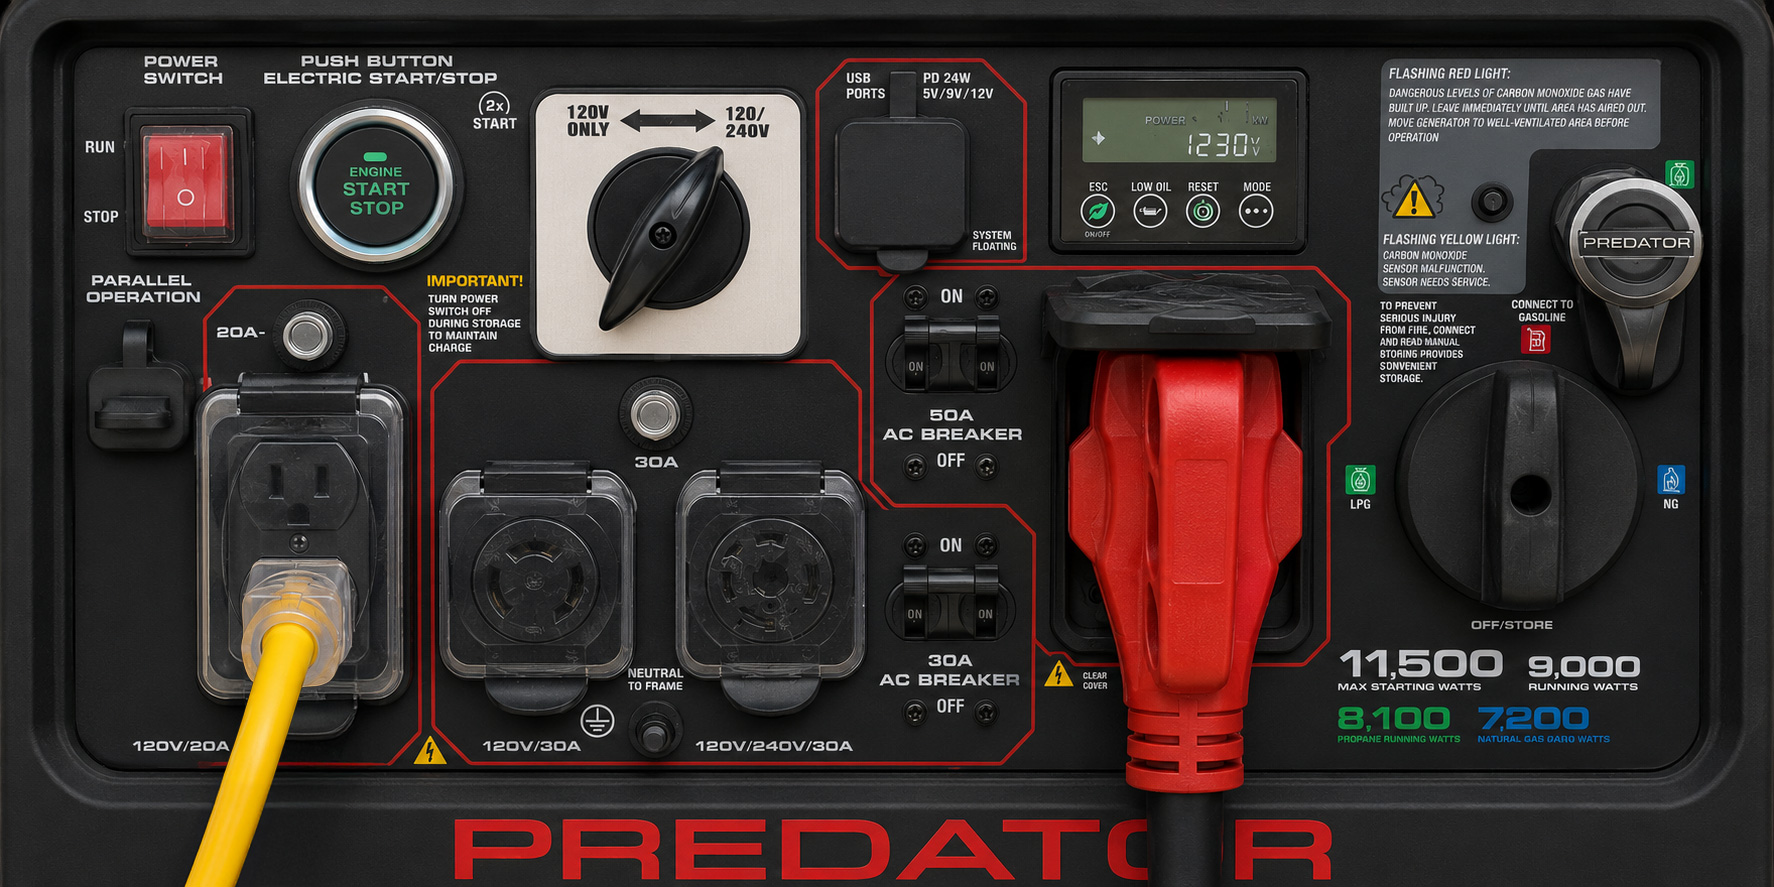
Power switch and the round electric start are top-left (step 4).